How do I get my client(s) set up on the safetime® Portal?

With safetime®, it is possible to add clients to the portal and allow them to access and view projects. However, many of our customers do not know how to add a client, and furthermore, give them access to projects. So in this ‘Troubleshooting‘ we are going to outline the simple process of adding your clients to the safetime® portal step-by-step.


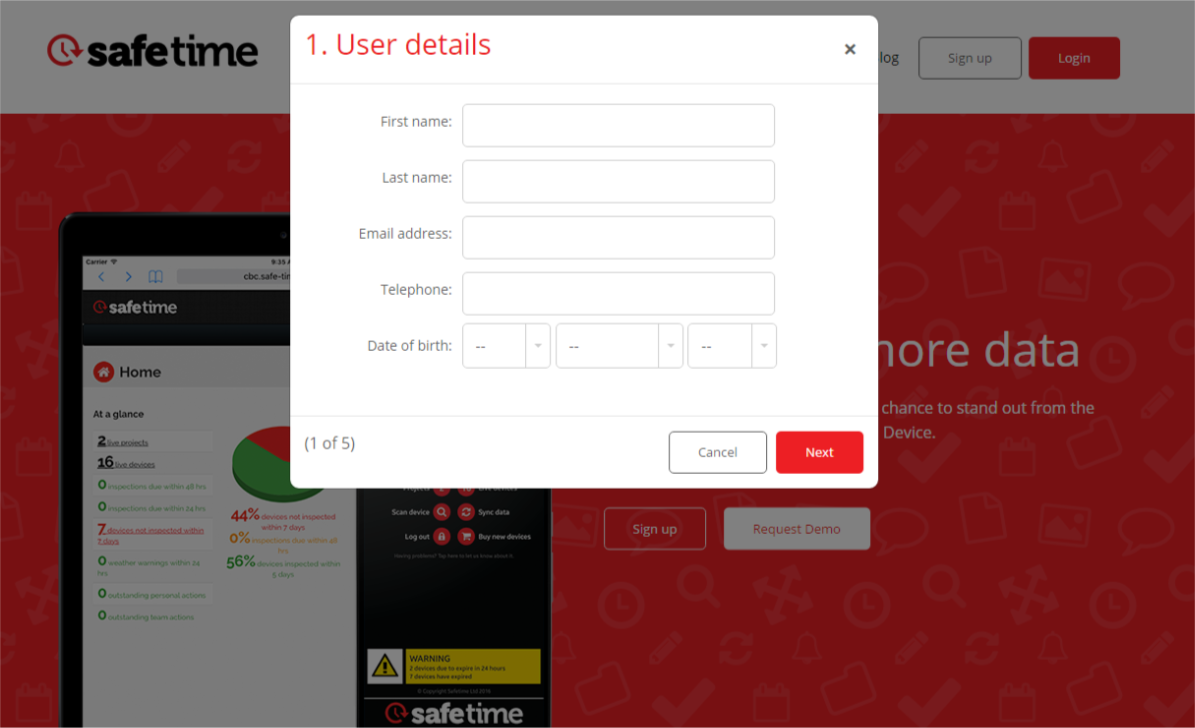
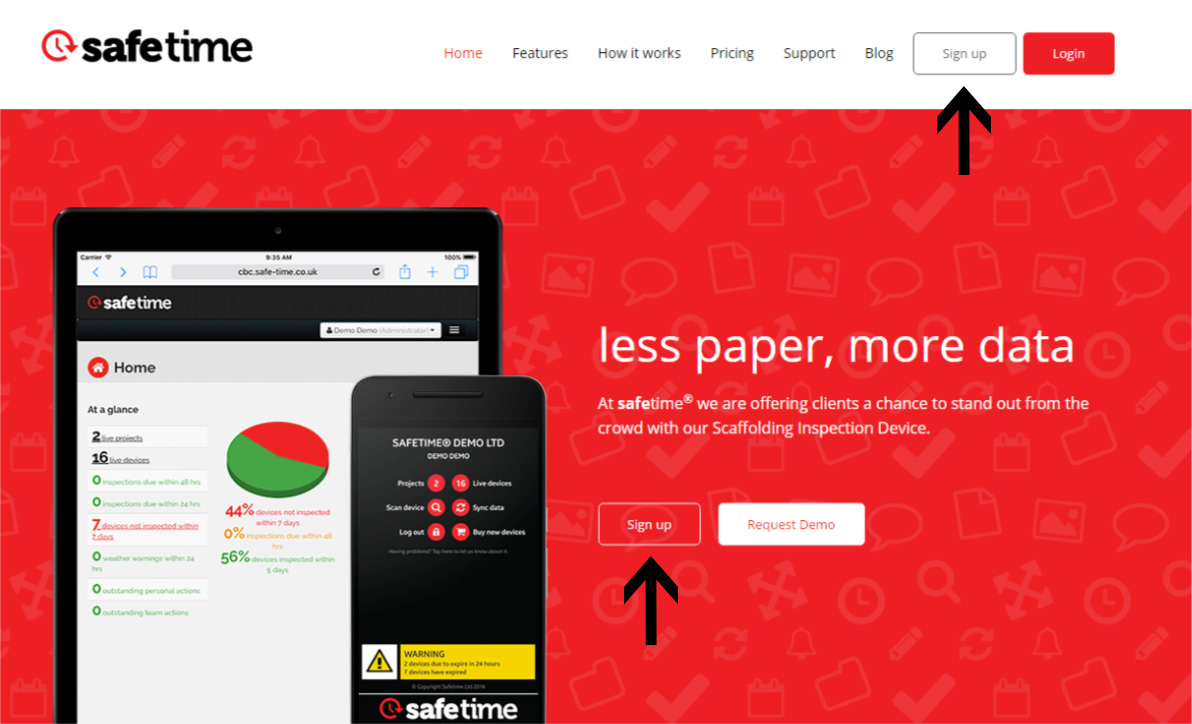
  1. Request your client to register as a user at www.safe-time.co.uk

    arrow pointing to the safetime sign up button

    They will be required to complete all of the fields on this page:

    safetime portal sign up form

  2. Once the client has signed up, ask them to confirm to you that they are up and running, i.e they have received their username, password and have successfully logged onto the safetime® system.

  3. After your client has confirmed that they are up and running, you will need to log into the safetime® portal at www.safe-time.co.uk and “sign in“.

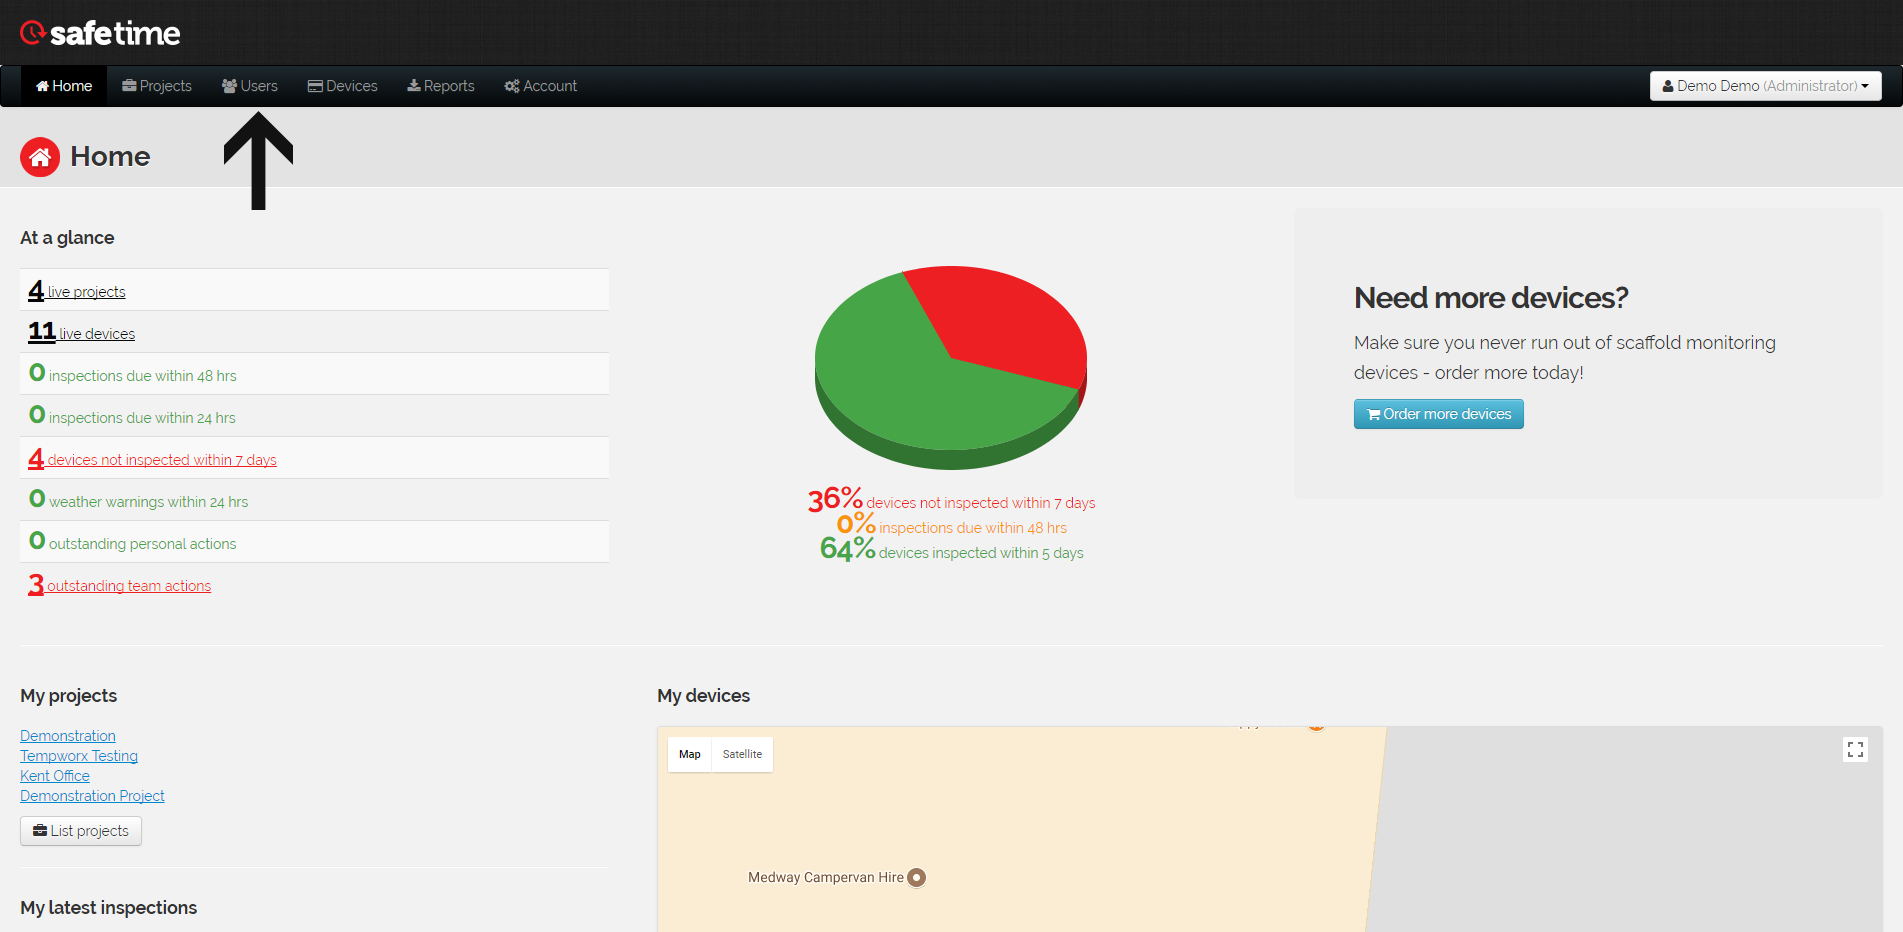
    On the homepage of the portal click on the “Users” tab:

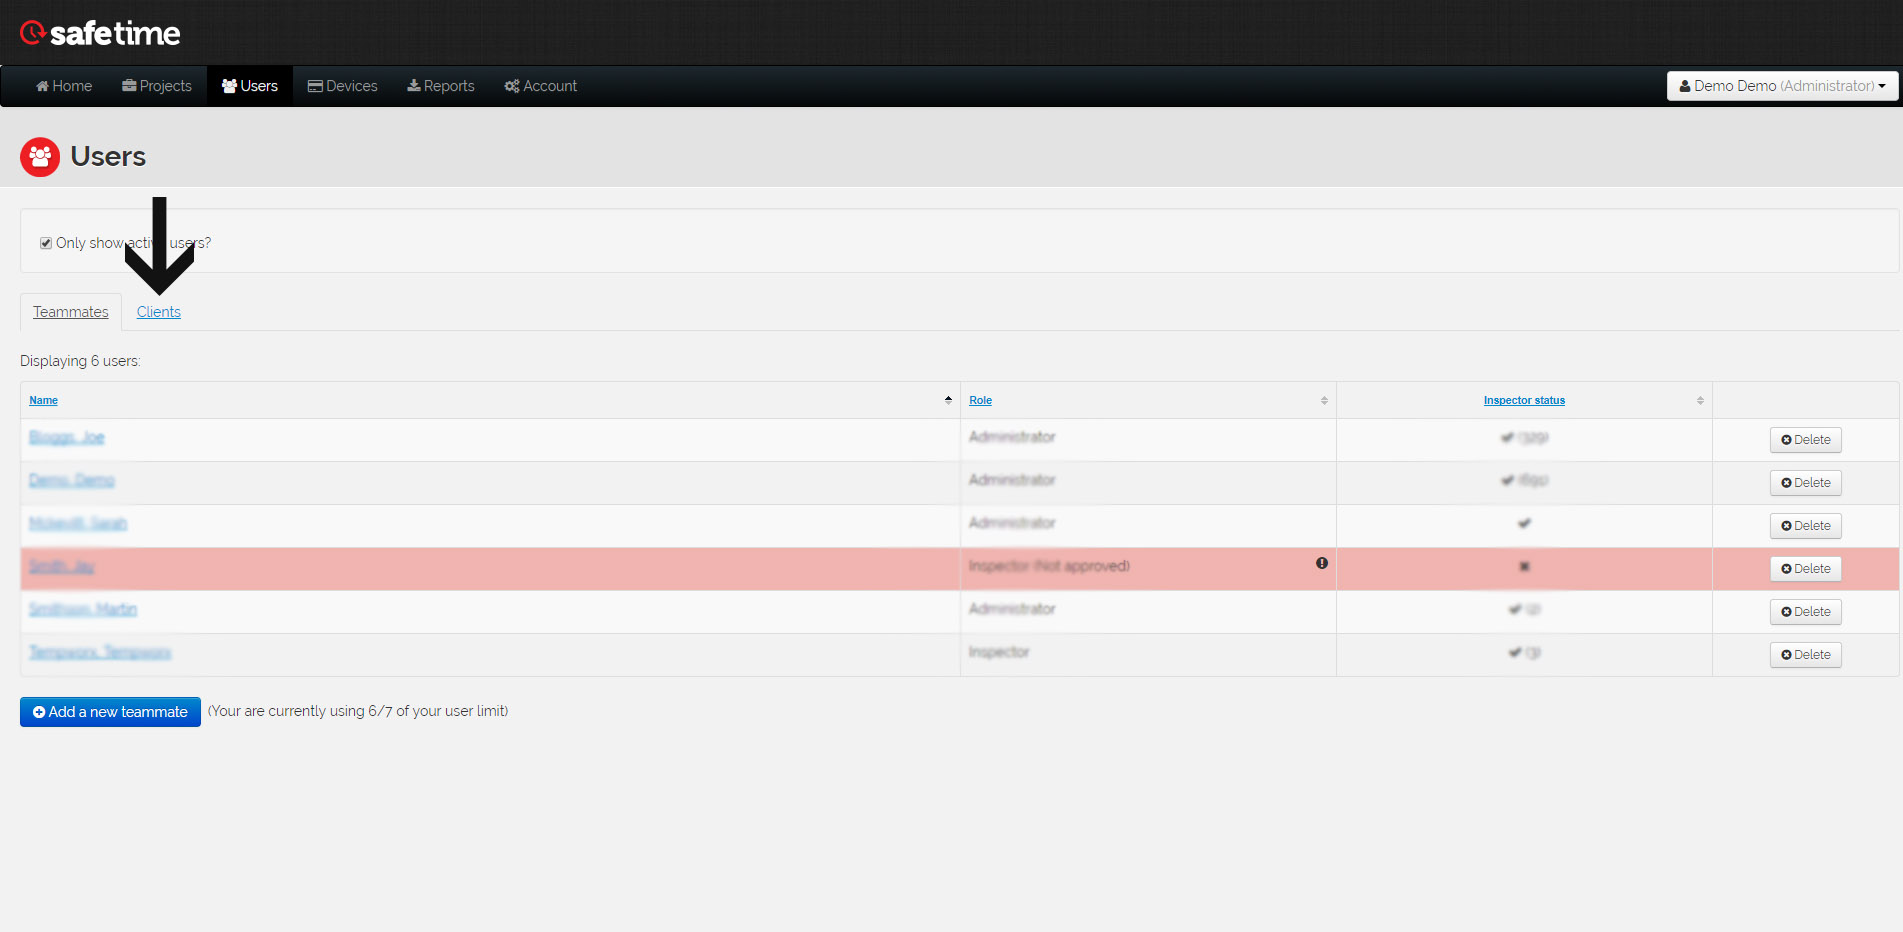
    From here click on the link “Clients”:

    Scroll to the bottom of the page and you will find a button that looks like this: (Click this button)

    add new client button

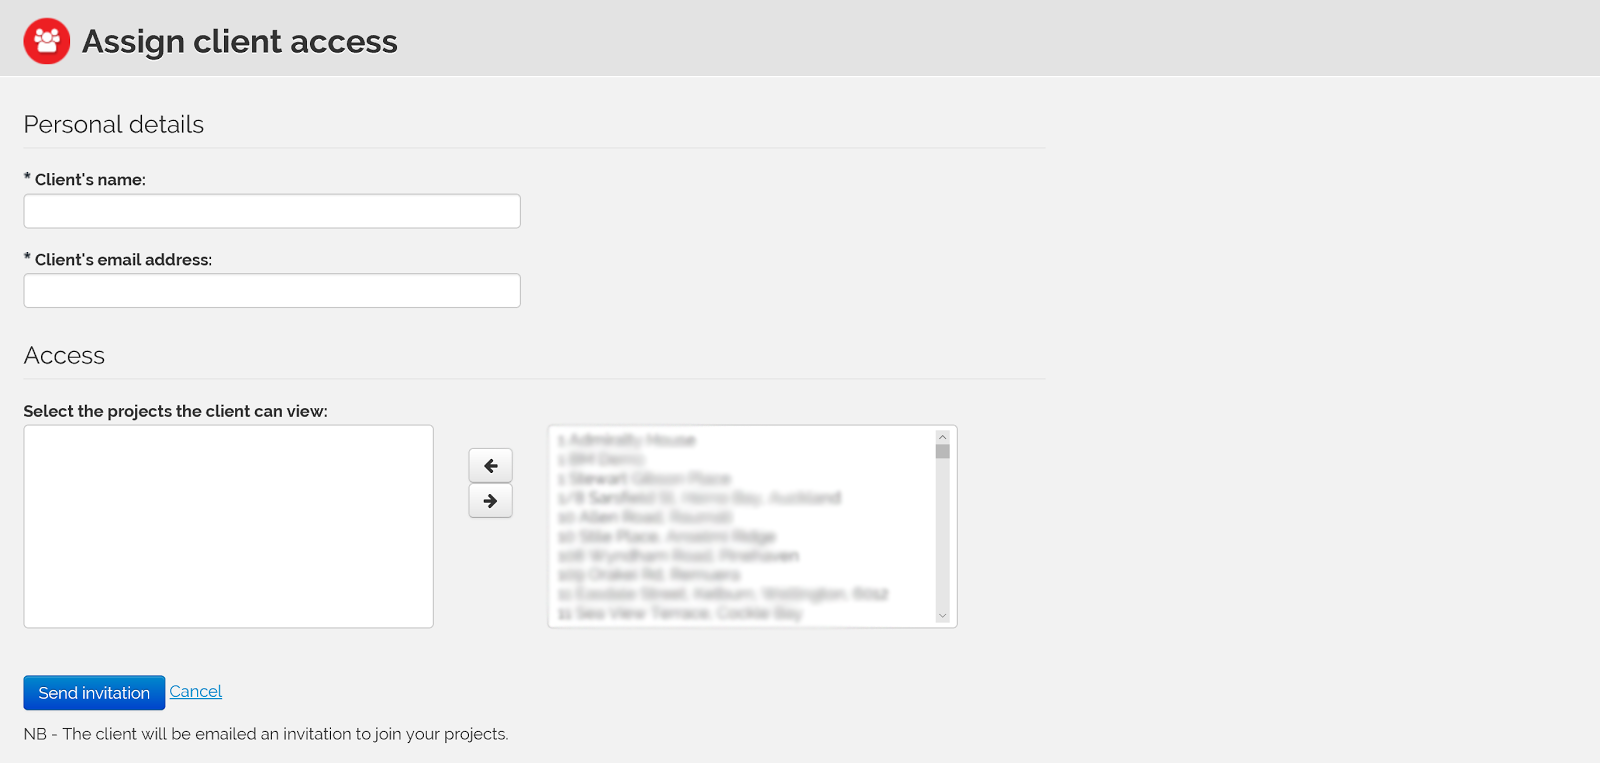
    This button will then take you to this page. Insert the details of the registered client(s) here (i.e. Client’s Name, Client’s Email Address):

    Make sure you include the projects you want your client(s) to be able to see in the “Access” box. Use the arrow keys to move the projects you want them to see to the left box. Once you have filled in all the required information, click the ‘’Send Invitation’’ button.

  4. Your client(s) will then receive an automated email. They will then need to accept the request. Once they have done this, your project will appear in their portal.


Your client setup is now completed.

If you have any further queries please do not hesitate to contact us.
Previous post
Next post

Related articles

November 11, 2024

Finding your mobile device’s NFC ‘sweet spot’.

The easiest way to increase your inspection efficiency with Inspect7®  Did you think that using Inspect7® to complete your inspection…

Read More
November 1, 2024

New features In Latest Update to Inspect7®

Exciting news! We have launched the latest update to Inspect7® and it is now available to download on iOS and…

Read More
October 11, 2024

Scaffolding Inspections and Inspect7®

Scaffolding is an essential tool on many types of construction projects as they provide a safe working platform for hard…

Read More
September 6, 2024

Ladder Inspections

Ladders are a common tool to use when working at height or for access in many organisations in the UK. They are…

Read More
August 1, 2024

Why is the Inspect7® Device yellow?

When you see an Inspect7 Device, you might wonder, “Why is the Inspect7® Device yellow?”.   A construction site is often…

Read More
July 11, 2024

Device Trial Packs for Inspect7® Inspection Software

Do you want to start using the Inspect7® inspection software, but you are unsure what device you would like to order?  …

Read More
June 12, 2024

Safety Decking Inspections

What is Safety Decking? Safety decking, platform decking or crash decking as it is commonly known, is a fall arrest/work-at-height…

Read More
June 5, 2024

Scaffold Towers Inspections and implementation of inspect7®

How inspect7® can be implemented? Our tagging system paired with our cloud-based portal creates the perfect digital solution for scaffold tower…

Read More

Book your free demo of Inspect7

For a free, no obligation demo of the Inspect7 system click on the button below.

Book demo